Tampilkan postingan dengan label Fall Fun. Tampilkan semua postingan

Muffin Tin Crayons

Do you have what seems like hundreds of broken crayons laying around? Before you toss them in the garbage, enjoy a fun project with your kids! We’ve chosen fall colors—to help us color our fall coloring pages.--but you can choose any combination that you like.

What you'll need:

  • Cupcake/muffin tin
  • Non-toxic broken crayons
  • Vegetable oil
  • toothpick

How to make it:

  1. Preheat the oven to 275 degrees F.
  2. Remove all the paper labels from crayon pieces. (Please check to make sure they are non-toxic crayons.)
  3. Put ¼ teaspoon of vegetable oil into each muffin pan cup, no cup liners needed.
  4. You will use the equivalent of 4 new crayons for each cup. Place broken crayons (no longer than an inch each) into the muffin pan. This will fill the cup about 1/3 full.
  5. Place into the preheated oven and watch carefully, they melt quickly!
  6. Bake crayons for 8 minutes or so.
  7. When the crayons begin to melt, remove them from the oven and stir gently with a toothpick.
  8. Crayon will look “ugly” and the colors may appear blended too much. Don’t worry! They look much better on the other side.
  9. Let the crayons cool completely.
  10. Once cooled, pop the crayons out of the muffin pan by tapping on the backside of the pan. Crayons should fall right out.


Tips:

  • If you have any new crayons available, use one as a measuring stick. Lay broken crayon pieces along side of the new crayon to measure out 4 full sized crayons. This is how many you will need for each completed chunky crayon.
  • Be sure to use extreme caution around kitchen utensils and the oven. Always use oven mitts and do not stick you fingers into the melted crayons.
  • If you don’t have any broken crayon pieces, you can buy a large box of cheap crayons at the Dollar Store.

  • Digg
  • Del.icio.us
  • StumbleUpon
  • Reddit
  • RSS
Read Comments

Fall Wreaths

This fall wreath craft project doubles as an outdoor activity for kids as they can collect materials just by taking a walk.

What you'll need:

  • Fall leaves, pinecones, etc.
  • Hay wreath
  • Hot glue gun
  • Large bow in fall colored ribbon
  • Fall colored ribbons to hang pinecones with

How to make it:

  1. Bake all pieces for 45 minutes at 200 degrees to kill any insects and eggs.
  2. Use the hot glue gun to attach the leaves, seeds, etc, to the wreath, and the large bow.
  3. Attach the pinecones to ribbons and hang them in the center.

  • Digg
  • Del.icio.us
  • StumbleUpon
  • Reddit
  • RSS
Read Comments

Sunflower Pillow Craft

This cute little pillow will look darling sitting on a shelf or desk; it even makes a great pincushion! Make one to celebrate autumn.

What you'll need:

  • ½ sheet gold felt
  • ½ sheet brown felt
  • 4-6 cotton balls
  • Small scrap of red felt
  • Black craft paint
  • Paintbrush
  • Hot glue gun
  • Pattern

How to make it:

  1. Using the pattern cut out 2 large circles from brown felt and the flower from gold felt. Cut out the center circle of the felt flower.
  2. Glue one of the brown circles onto the center of the flower.
  3. Turn the flower over and glue the other brown circle to the other side, leaving about an inch or so open for the filling.
  4. Carefully stuff the center of the flower with cotton balls.
  5. Glue open end of the circle shut.
  6. Cut an oval from the red felt to make a ladybug.
  7. Paint one end of the red felt with black paint to create the head. Use the handle end of the paintbrush to add dots to the ladybug’s back. Let paint dry.
  8. Glue ladybug to the flower.

Tips:

  • Hot glue can really hurt, so have a grown-up help you with those steps.
  • When gluing the last part of the center circle closed, use a toothpick or craft stick to press the felt onto the glue so that you don’t burn your fingers.
  • Keep plenty of different colored felts on hand for fun and quick projects!

  • Digg
  • Del.icio.us
  • StumbleUpon
  • Reddit
  • RSS
Read Comments

Cozy Fleece Scarf Craft

Looking for a fun sewing project for those with little experience? A scarf is the perfect project for kids, especially with cooler weather just around the corner. Even parents with minimal sewing experience can guide their kids in making these.

What you'll need:

  • ½ yard fleece fabric
  • Sewing machine
  • Thread to match fabric color
  • Scissors

How to make it:

  1. Cut two pieces of fleece equal in length and width. Length will determine how long your scarf will be.
  2. Lay the two equal pieces with the right sides (the side that has the pattern on it) facing in each other.
  3. Leaving approximately a ¼” seam, sew the full length of the scarf. Repeat on the other side. You will end up with a long tube of fabric with open ends.
  4. Using a pair of scissors, cut the fringe by cutting ½” wide slits about 4” up from each end.
  5. Turn scarf inside out so that the sewn seams are now on the inside, finished edges are on the outside.
  6. Sew a running stitch along the top of the fringe to “close” the ends of the scarf.
  7. Trim any loose threads and you are done!

Tips:

  • Half a yard of fleece will make one scarf approximately four and a half feet long. If you want a longer scarf, simply get more fabric. Ask for assistance at your favorite fabric supply store.
  • Use good scissors. Cheap or old scissors that have dull blades will make this project much more difficult than it needs to be and can cause problems with cutting straight lines.
  • This is a fun and inexpensive project. Ask store staff where to find the fleece that is on sale. Our scarves cost $3 to $4 each to make.

  • Digg
  • Del.icio.us
  • StumbleUpon
  • Reddit
  • RSS
Read Comments

Acorn Wreath

This acorn wreath is a wonderful fall craft project that makes a great gift or decoration for your home.

What you'll need:

  • Acorns
  • Wicker wreath
  • Hot glue gun
  • Glue sticks
  • Newspaper
  • Flowers or other decoration

How to make it:

  1. First, spread the newspaper on a flat surface.
  2. Lay your wreath down flat.
  3. Heat your glue gun.
  4. Next, starting in the middle of the wreath, begin gluing the bottom of the acorn. Place the glued part of the acorn in the middle of the wreath and stand the acorn straight up.
  5. Make one row in a straight line going all the way around the wreath.
  6. Repeat the process from top to bottom with the wreath still laying flat.
  7. Then decorate with flowers, bows, or even holiday ornaments. Be sure not to leave any open spaces except in the back. The back of the wreath shouldn't have any acorns on it so when you lay it down it is flat.

Tips:

  • A wreath hanger is recommended because it is very heavy.

  • Digg
  • Del.icio.us
  • StumbleUpon
  • Reddit
  • RSS
Read Comments

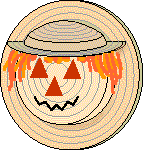
Scarecrow Wall Decoration

Give your kids a fun craft to do for Halloween with this scarecrow wall decoration. It's fun for farmers 8 and up all the way to seniors.

What you'll need:

  • 2 Straw hats - 16" and 12"
  • Raffia
  • Felt
  • Pipe cleaner
  • Ribbon
  • Tacky craft glue or hot glue gun

How to make it:

  1. Cut the 12" hat in half.
  2. You will need a small package of colored raffia (if available). Spread out and place on the crown of the 16" hat. This is representing the hair on his/her head.
  3. Glue raffia in place with thick designer tacky or hot glue whichever is available to you.
  4. Now place glue on the cut edge of the 12" hat and place atop hair and against brim of 16" hat.
  5. Cut triangles out of felt for eyes and nose. Place on crown forming face.
  6. Use a black pipe cleaner for his mouth. Bend pipe cleaner /\/\/\/\/\ so it looks like that. Glue to crown.
  7. Make a bow for neck area (under crown) and glue in place.

Tips:

I put fall leaves on top of his hat to also give some color. It can be done actually with any size hat, just adjust accordingly.

  • Digg
  • Del.icio.us
  • StumbleUpon
  • Reddit
  • RSS
Read Comments

Wheelbarrow of Leaves

What better way to collect all those falling leaves than with a wheelbarrow? Have fun with these chores when you make this fun autumn project.

What you'll need:

  • Cardboard graham cracker box
  • 2 jumbo crafts sticks
  • 4 regular craft sticks
  • 1 sheet light blue felt
  • 8 cotton balls
  • Tissue paper in fall colors
  • Black acrylic craft paint
  • 2 wooden doll pin stands
  • Scissors
  • White craft glue
  • Hot glue gun

How to make it:

  1. Cut the top off of the cardboard graham cracker box, leaving about 3” of box from the bottom.
  2. Cut the sides of the box at an angle so that one end measures 3” high and the other end measures 1” high.
  3. Cover the cardboard with blue felt using white craft glue.
  4. Turn the felt covered box over and starting about 1” from the shorter end, glue one of the jumbo craft sticks to the bottom. The craft stick should stick out about 1” from the higher side of the box.
  5. Paint the doll pins stands with black paint and let dry.
  6. Glue two of the regular sized craft sticks together, stacked evenly on top of each other.
  7. Glue the stacked craft sticks to the jumbo craft stick on the bottom of the wheelbarrow. The stacked craft sticks should be standing on their sides when glued to the jumbo stick. Glue in place so that about 1/3 of the doubled craft sticks are sticking out in front to hold the “wheel”.
  8. Glue the doll pin stands to the end of the stacked craft sticks, one on each side, lined up evenly as the wheel.
  9. Cut the remaining jumbo craft stick in half and glue to the bottom of the box, overlapping the back end of the first jumbo craft stick. The two jumbo sticks should form a “T”.
  10. Cut the remaining two regular sized craft sticks in half. Take two halves and hot glue the cut ends to the cut jumbo craft stick as the legs of the wheelbarrow (see photo).
  11. Hot glue the remaining two halves on as the handles of the wheelbarrow, gluing them to the short end of the box.
  12. Turn the wheelbarrow right side up and line the bucket of the wheelbarrow with white craft glue. Cover the glue with cotton balls.
  13. Tear tissue paper into 3” square pieces and crumple them up, them glue on top of the cotton balls.

Tips:

  • Hot glue can really hurt, so have a grown up help you with those steps.
  • Note that hot glue in only used to attach the craft sticks and the wheels together. Use white craft glue for the other steps.
  • Recycle snack, cereal and cracker boxes to make fun craft projects!

  • Digg
  • Del.icio.us
  • StumbleUpon
  • Reddit
  • RSS
Read Comments

Fun Fall Crafts for the Whole Family

As fall approaches we always seem to think about scarecrows--but what about the crows themselves? This cute little fellow is easy to make and cute to boot!

What you'll need:

  • Cardboard tube
  • Cardboard egg cup
  • 2-3 cotton balls
  • 5” square piece of tan felt
  • 4” x ½” strip of brown felt
  • Small scrap of gold felt
  • 2 medium wiggle eyes
  • 3 orange buttons
  • 1 miniature gold foam flower
  • 1 miniature brown pompom
  • Black acrylic craft paint
  • Paintbrush
  • Scissors
  • White craft glue
  • Hot glue gun

How to make it:

  1. Paint cardboard tube with black paint and set aside to dry.
  2. While the tube is drying, put a little hot glue to the bottom of the egg cup and place egg cup in the center of the tan felt square, open end up. Use hot glue around entire outer area of the egg cup and gather the tan felt around it. Hold in place for a moment to allow hot glue to cool. Turn over to create the hat.
  3. Wrap brown felt strip around the tan felt at the edge of the egg cup opening and glue in place.
  4. Use scissors to shape the brim of the hat.
  5. Glue the foam flower to the hat band and stick a miniature brown pom pom to the center of the foam flower.
  6. Cut a triangular beak from the gold felt.
  7. Use hot glue to attach the hat to the top of the black cardboard tube.
  8. Glue on wiggle eyes, beak and buttons.

Tips:

  • Hot glue can really hurt, so have a grown-up help you with those steps.
  • Note that steps 2 and 7 are the only steps that use hot glue. Use white craft glue for the other steps.
  • Save cardboard tubes from bathroom tissue and paper towel to make fun craft projects!

  • Digg
  • Del.icio.us
  • StumbleUpon
  • Reddit
  • RSS
Read Comments

Fruit & Veggie Stamp Friends

Make fun paint stamps out of fall harvest vegetables and fruits! Use carrots, squash, apples, and anything else that strikes your fancy.

What you'll need:

  • Carrots, apples, and yellow squash
  • Paint: red, yellow, orange, light blue, green and white
  • Paintbrush
  • Black marker
  • Art paper

How to make it:

  1. Have an adult slice the vegetables and fruits in half lengthwise.
  2. Dry off the cut sides by blotting them with a paper towel (see image).
  3. Paint each cut side with a generous amount of paint.
  4. Press painted side on to paper and remove (see image). Do this for as many veggie and fruit stamps you want.
  5. Draw eyes, mouths, arms and legs with black marker.
  6. Dip a dry paintbrush in green paint, dab off excess on paper towels. Paint grass on paper.
  7. Use same dry brush method when using the light blue paint for the sky.
  8. Dip a clean paint brush into white paint, but don’t dry off on paper towel. Lightly dab the paintbrush onto the paper to create clouds.

Tips:

  1. Fall brings plenty of fun shaped squash and gourds. Try different types of gourds, miniature pumpkins, and squash with this project.
  2. Apples make great caterpillars! Stamp the vegetable onto the paper horizontally and add as many legs as you like.
  3. Alter this project to spring by using apples and carrots and bright colors such as pink, yellow, and bright orange.

  • Digg
  • Del.icio.us
  • StumbleUpon
  • Reddit
  • RSS
Read Comments

Leafy Door Hanger

Celebrate the return of fall right from your front door. Kids will love putting this craft together by getting their hands dirty with finger painting.

What you'll need:

  • 1 large piece of art paper or 2 sheets of white construction paper
  • Acrylic craft paint in fall colors such as red, orange, brown, yellow, gold and green
  • Scissors
  • 15" twig or branch
  • 4- 15" lengths of jewelry cord
  • White craft glue
  • Football-shaped cookie cutter (optional)

How to make it:

  1. Using a paper plate or paint palette, squeeze out about a quarter-size dollop of each color of paint.
  2. Finger paint the entire piece of art paper with the different colors. Let children be creative, just guide them if they start to blend colors too much as you can end up with a brownish gray color. Let the paint dry completely (see image).
  3. When the paint has dried, turn the paper over and do the same thing on the other side. Let dry.
  4. When paint has dried, use a football-shaped cookie cutter to draw out as many shapes as you can on the painted paper. If you don’t have a cookie cutter, draw out simple leaf shapes (see image).
  5. Cut out the leaf shapes and set the scraps aside to use for another project.
  6. Set a bug-free branch on the work surface. (See the tips section for methods of ridding branches from bugs.) Line up three pieces of the jewelry cord, evenly spaced from each other, along the stick.
  7. Glue the leaves onto the cord, placing one under the cord, and then overlapping a second leaf over the first leaf and the cord. Repeat until all three cords have leaves (see image).
  8. Tie the top end of the cords to the stick. Secure with some white craft glue (see image).
  9. Tie the remaining piece of jewelry cord to both ends of the stick to create the hanger. Secure knots with some glue. Let glue dry.
  10. Trim the excess cord ends.

Tips:

  • Save the reserved scraps of painted paper for another project. These would be perfect for a mosaic craft.
  • Rid twigs of bugs by soaking them in a combination of water and bleach. Fill a bathtub up half way and pour in 2 cups of bleach. Make sure to turn the twigs so all sides are soaked. After 24 hours, transfer the twigs into a large clean plastic bucket and soak in cold water for an additional 24 hours. Let dry completely before using.
  • White craft glue is best and safest, but hot glue can be used to attach the cord to the sticks and will adhere faster.

  • Digg
  • Del.icio.us
  • StumbleUpon
  • Reddit
  • RSS
Read Comments

Patchwork Acorn

With this project, your child can create a beautiful piece of artwork just in time for the falling of the leaves.

What you'll need:

  • Scraps of painted paper from the leaves you cut from the Leafy Door Hanger, a piece of paper finger painted with fall colors, construction paper or magazine pages in red, orange, yellow, green, and brown
  • 1 sheet of black construction paper
  • 1 sheet of white copier paper
  • Black marker
  • Pencil
  • Paper clip
  • Scissors
  • Acorn pattern

How to make it:

  1. Cut the scraps of painted paper/construction paper/magazine pages into 1/2” – 1” pieces.
  2. Print acorn pattern, you will need to enlarge the image.
  3. Trace around the pattern using a black marker (see image). Place a piece of white paper on top of the pattern and paper clip it to hold in place.
  4. Use glue bottle to trace around the pattern on the blank paper, the black marker should show through allowing you to trace. Fill in the pattern area on the blank paper with white craft glue. Remove paper clip and take printed pattern out from behind the glued paper (see image).
  5. Place painted paper scraps onto the glue, overlapping the edges of the pattern and leaving some white space between each scrap of painted paper. Set aside to dry (see image).
  6. Take printed pattern and place over the top of one sheet of black construction paper. Use a pencil to trace the outline of the acorn pattern, pressing firmly so that the black paper underneath becomes indented.
  7. Remove pattern and carefully cut out the two traced shapes from the black paper, leaving an acorn shaped window in the black paper (see image).
  8. Line up the black paper with the acorn-shaped window over the top of the mosaic acorn picture so that the mosaic pieces appear through the window.
  9. Glue or tape the white paper onto the back of the black paper with the acorn window.
  10. Glue extra pieces of painted paper around the border of the paper as a mosaic frame.

Tips:

  • You can use torn pieces of autumn colored construction paper or have children color paper with crayons.
  • Want to make the back of the artwork look neater? Glue on another piece of black paper to the back so that you cannot see the white paper at all.
  • Try other shapes like fall leaves or apples.
  • White craft glue works great, but glue sticks would be less messy if that’s a concern.

  • Digg
  • Del.icio.us
  • StumbleUpon
  • Reddit
  • RSS
Read Comments